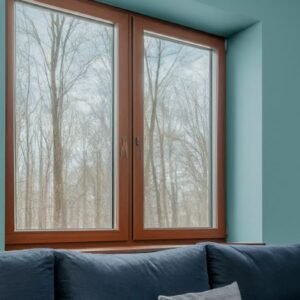
How to Replace a Window in 8 Steps?
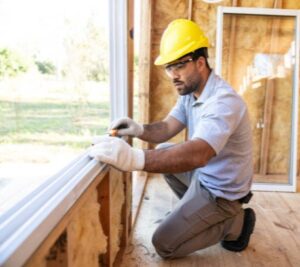 Every homeowner desires a home with new, functioning, and bright windows. In addition to making buildings less attractive, leaky or worn-out windows play a role in energy loss and make the spaces inside uncomfortable. Imagine turning towards your window, and all you see are those icy winds coming and gushing through them. If you’re wondering how to replace a window, consider seeking professional assistance for a seamless upgrade.
Or maybe the ever-present fogging blocking your vision. Installing replacement windows will be the next line of action, yes? Upgrading your windows makes your house look more attractive and increases your home’s energy efficiency and comfort.
Replacing them may get you concerned, but you don’t have to be afraid. In 8 simple steps, you can remodel your home with fresh and effective energy-saving windows. This guide is designed to allow homeowners to install replacement windows easily, providing the necessary support to transition from old windows to new ones seamlessly, with a refreshed environment that features a combination of improved aesthetics and a boost in functionality.
Importance of Window Replacement

- Energy Efficiency Boost: A vital step in the process is replacing outdated and poorly fitted windows with energy-saving ones. In most cases, existing windows are responsible for energy loss, so heating and cooling systems are forced to operate more frequently. This upgrade provides better insulation, which in turn lowers the utility bills and also promotes an environmentally friendly home.
- Enhanced Aesthetics: Outdated window frames and worn-out window sill detract considerably from your house’s charm and could even affect your overall appearance. Installing replacement windows is a great way to revamp the curb appeal, thus making your house look fresh and appealing and increasing its value tremendously.
- Improved Comfort and Temperature Control: Existing windows with run-down frames may lead to drafts. Installing quality replacement windows ensures a snug fit, leaving out drafts and providing good temperature control, eventually making the living space more comfortable.
- Reduced Maintenance: Deteriorating windows, on average, need quite a remarkable amount of care and repairs. Switching to the latest replacement windows drastically reduces the amount of maintenance needed, which ultimately results in more savings on time and money in the long run.
- Increased Property Value: The replacement of windows has a payback value and provides other benefits. These days, if you want to sell your house, the first thing you need to do is update and fix your windows because they are crucial to increasing the property value and winning over more buyers. Install replacement windows of a newer type if your home is older, and aim for a potential house value increase.
8 Steps on How To Replace a Window in a House
 Replacing your windows is an investment that yields, in the long run, a house that is more efficient energy-wise and pleasing to look at. Follow these 8 window replacement steps for a seamless process:
How to Replace a Window Step 1: Assessing the Need for Replacement
Signs of Deteriorating Windows
Before you decide on a replacement, look at the condition of your existing window frames. Look for obvious signs of deterioration, which include, for example, rot, warping, or peeling paint. Leaks or cracks are warning signals announcing poor seals, which, in turn, increase energy expenses and degrade appearance.Identifying When Replacement Is Necessary
Check out the age of your windows with regard to the level of deterioration. If you repeatedly have to turn to repairs to get your existing window frames in a functional state or see signs of irreversible decay in the frames, you may want to consider replacing them. Depending on contemporary selections, like insert windows or pocket replacement windows, many issues like efficient sealing and keeping the integrity of the existing frame can be resolved.How to Replace a Window Step 2: Gathering Materials and Tools
Essential Materials and Tools for Window Replacement
Essential materials and tools for window replacement include the following:- Replacement windows (such as double-hung windows or vinyl replacement windows)
- Caulk and weatherstripping
- Insulation such as R-13 unfaced fiberglass and low-expansion foam insulation
- Jamb liners

- Drill
- Electric nailer
- Chisel
- Tape measure
- Level
- Pry bar
- Putty and utility knife
- Safety glasses and hearing protection
- Shims
- Screwdriver
- Hammer
Types of Replacement Windows
Double Hung Windows: These multipurpose windows feature unique sashes with two separate sashes, one above the other, providing the option to slide up and down. They control ventilation well and offer convenient cleaning, serving as the most preferred option for many homeowners. Vinyl Replacement Windows: It is widely known that vinyl windows have several advantages: they are durable, energy sensitive, and require very little maintenance. They vary by style and color, allowing you to choose which complements your house’s aesthetic. Double Pane Windows: Dual pane windows have two glass panes separated by argon, which is non-reactive air, thus providing the best thermal insulation and decreasing energy costs for heating and cooling. They also sharply reduce the sound of noise from the world outside.How to Replace a Window Step 3: Taking Measurements

Measuring the Existing Window Frame
Before ordering any new window, it is essential to determine the dimensions of the existing window frame. Accurate measurements are the foundation of successful window replacement operations. To start, place the measuring tape diagonally from one corner to the other and take the measurement you get. Then, take three measurements: top, middle, and bottom. Choose the smallest measurement since it is the most important measurement as it determines the precise fit for the replacement window.
Determining the Appropriate Size for Replacement Windows
Establish the smallest measurement when selecting standard window sizes to see if the replacement window will sit flush with the existing window frame. Pay special attention to the side jambs to ensure they overlap properly regardless of wind conditions. This precision input is the key step, leading to superior energy-efficient windows that enhance the looks of your home and reduce energy bills.How to Replace a Window Step 4: Removing the Existing Window

Step-By-Step Guide to Safely Remove the Old Window
- First, release the lock and then open the current window to access the upper sash.
- Remove any attached component, such as a lock or handle, from the window.
- Patiently pry off the exterior trim using a pry bar or a putty knife.
- You are required to then, very carefully, disconnect upper the sash from where it is situated on the window frame, which should be set aside at this stage.
- Repeat the process for the lower sash and make sure that it is disconnected from the window frame.
- With both sashes removed, take a close look at the frame of the window to make sure that you have eliminated all the remaining screws and nails.
- Lever on a utility knife to cut the old caulking or sealants around your window frame.
- Finally, properly remove the old window frame from the window opening so as not to damage the wall or the trim by the frame.
Dealing with Old Caulking and Sealants
It may require more effort to get old caulking and sealant off the window frame during the removal. A utility knife or a caulk removal tool can be used to cut the old caulking as this will make it easier to peel away the window frame from the opening. After taking out the old window frame, all you have to do is clean the window opening. Consider using a sash replacement kit or a pocket window insert for easy of installment or a perfect fit inside the existing window opening. Before deciding on composite windows or casements, you must be aware that the old window frame removal is a vital step in any window replacement project.How to Replace a Window Step 5: Preparing the Window Frame

Cleaning and Inspecting the Window Frame
First, make sure you clean the section around the window properly; debris, dust, and old caulking have to be removed. Then, conduct a frame damage-check, looking for indications of problems such as rot, warping, or termite infestation. Check for water damage in the frame made of wood, especially on the lower parts, especially on the base of the frame. Take care of mold and mildew with the appropriate solution and scrub. Then, double check that the frame is completely dried prior to the beginning of repair work or installation.Making Necessary Repairs to the Frame
- Make use of wood filler or epoxy to fill in the cracks and the holes in wood frames to deal with the minor damage.
- Once the filler dries, the sanding process can be initiated to make those places smooth.
- You may have to try using the new wood or composite materials instead if the damage is severe enough.
- Check whether the frame is square and level, and make adjustments if needed to achieve correct positioning.
- After being framed, the frame should be secured with additional screws or nails to make it stable.
- Apply a primer to the repaired surfaces; after that, seal the frame. It will prevent further damage.
How to Replace a Window Step 6: Installing the Replacement Windows

Step-By-Step Installation Process
- Begin by putting the replacement window into the rough opening until it is firmly pressed.
- Let the window be situated evenly on the sill, and the bottom edge aligns with the rough opening.
- Measure the diagonals from one corner to the other to see if the shape is square.
- Make sure the window is temporarily protected by the shims to maintain alignment.
- Attach the upper part of the sliding windows to the edges of the head jamb with the screws that have been punctured through the pre-drilled holes.
- Check the shims to ensure the window sits accordingly to allow it to be level and plumb.
- Insulate around any window jambs with fiberglass insulation to improve energy efficiency.
- Place a constant caulk on the window frame’s outer side to prevent drafts.
- Follow the directions provided by the window manufacturer for any other steps necessary in the case of installing a full-frame window replacement.
- Finish the window installation by only sticking the window into the frame and then screwing the side jambs through the window.
How to Replace a Window Step 7: Insulating and Sealing

Adding Insulation To Improve Energy Efficiency
The energy efficiency of your newly installed windows can be enhanced by including the right insulation. Put insulation materials, which could be fiberglass or foam, in the spaces between the window frames. This serves the dual goals of regulating temperatures as well as cutting energy expenditure for cooling and heating.Proper Sealing Techniques To Prevent Drafts
- Continuously beading the exterior parimeter of the window frame with a high-quality caulk.
- Seal the gap between the window and the rough opening to prevent air intrusion.
- Examine for openings or cracks and seal them using caulk, weatherstripping, or any other available methods.
- Take note of the edges, making sure that the edges are smooth and don’t leave out any traces of draft.
- In addition, think about installing weatherstripping on windows in moving parts (such as sashes) for extra security.
- Conduct routine inspections and replacement of weatherstripping to create an airtight calibration and therefore stop energy loss.
How to Replace a Window Step 8: Before and After Window Replacement
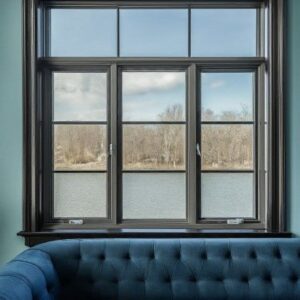
Comparing the Condition and Appearance Before and After
See for yourself how things change in both the apartments’ looks and their condition before and after window replacements. Note the deteriorated frames, drafts, and any aesthetic deficiencies prior to the renovation. The dissimilarity between the two options will be significant—from a worn, unproductive window to a brand-new, energy-efficient one.Assessing the Improvements in Energy Efficiency and Aesthetics
Apart from aesthetics, think about the advantages that each new window adds to your home. Situate yourself in a new window, and you will feel the changes in energy efficiency since the windows better insulate and prevent the occurrence of drafts and heat loss. Pay attention to the new level of comfort in your home and the energy bills, because the process of window replacement can offer a comfortable lifestyle and at the same time save on heating and cooling costs. Adapt to the changes and get the amazing function and aesthetic that new windows add to your building.Post-Installation Maintenance and Tips
 Regular Cleaning: Keep the aesthetic and functionality of each new window by cleaning them on a regular basis, using mild soap and water for the cleaning process. Try gentle cleaning substances instead of abrasive cleaners, which are hard on the window surfaces.
Inspect Seals and Caulking: The window seals and caulking compounds around its frame must be checked for wear and breakage during the inspection. Fill up the cracks or gaps as soon as possible so as not to give the chance for any air-flow coming in or water even entering.
Operational Checks: Periodically test whether the windows you have installed work correctly by checking if they open, close, and lock well. Letting the problems linger will likely worsen the damage if there’s any; hence, it is good to address them as soon as possible.
Trim Overhanging Branches: Make sure to cut back any tree or shrub branches that come closer than an arm’s length to your window panes in order to prevent them from being scratched or chipped during windy weather.
Professional Maintenance: Think about requesting for periodic annual maintenance inspections from a professional window installer who will perform a diagnosis of any possible problems and recommend a solution in advance, so the windows’ lifespan can be extended.
Recommendations for Professional Assistance if Needed
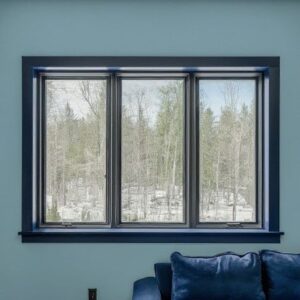 In case you come across difficulties during the windows replacement process, do not disregard them but seek out professional assistance. Windows Replacement USA is the right place to consult for the best services. Our professionals with many years of experience, can cover even the most complex problems to achieve a smooth installation process and a final result that exceeds your expectations.
Conclusion
Farewell to the episodes of cold drafts and old window defects. Note that implementing this guide to the fullest enables you to cut energy monthly bills while making the home look more wonderful. Each step in this guide, from the replacement process to the installation maintenance, contributes to the success of replacement window. Take pleasure in the added comfort, improved insulation, and aesthetic beauty that your new windows will offer.
Replated Article: 5 Essential Considerations for Sliding Glass Door Replacement


